Responses Domain User Help Page
Introduction
This data domain in KDW deals with Response domain data of the KDW countries.
The Responses data in KDW consists of dataseries (Responses) and datapoints (Response Value) records.
This page provides information on both dataseries and datapoints.
Responses (Dataseries)
Response Value (Datapoints)
 Go to Top
Search or filter Response dataseries
The Responses page lists the currently available Responses dataseries in a grid format (see below) with column headers: Geographic unit, Operator, Operation type, Fund type, Operation id, Assistance type, Indicator, Source document
The Responses dataseries page can be opened from KDW menu: Dataseries Management > Response > Response dataseries
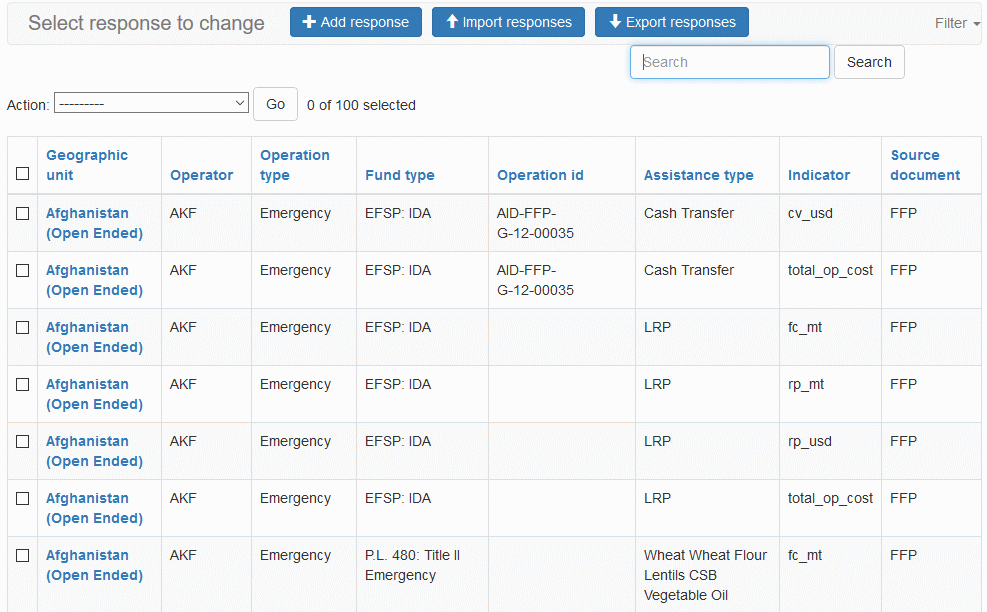
Fig. 1: Responses page
You can also search the list by entering a search criteria in the Search text-box at the top of the Responses page and clicking on the  button to search and display matching results in the grid (see below).
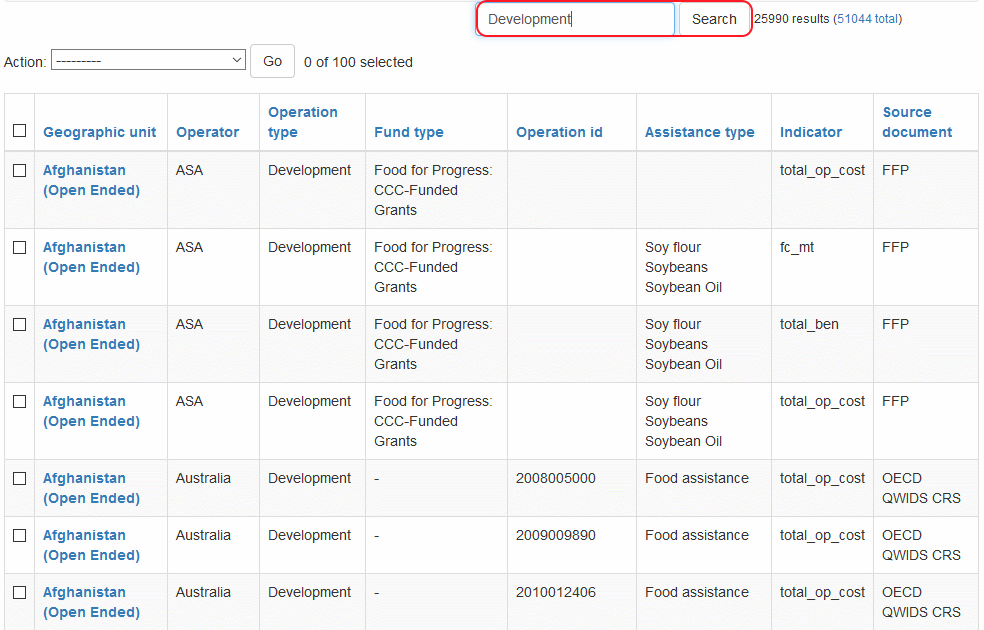
Fig. 2: Search Responses data
In addition to searching the Responses records with a free-text criteria, the system also allows you to Filter the records by specifying a Filter filter criteria.
To set a filter criteria, you can use the  button at the top-right side of the page (see below). When you specify a filter by selecting a value from the drop-down list, the system will automatically apply the filter and display the records that match all the filters you have specified.
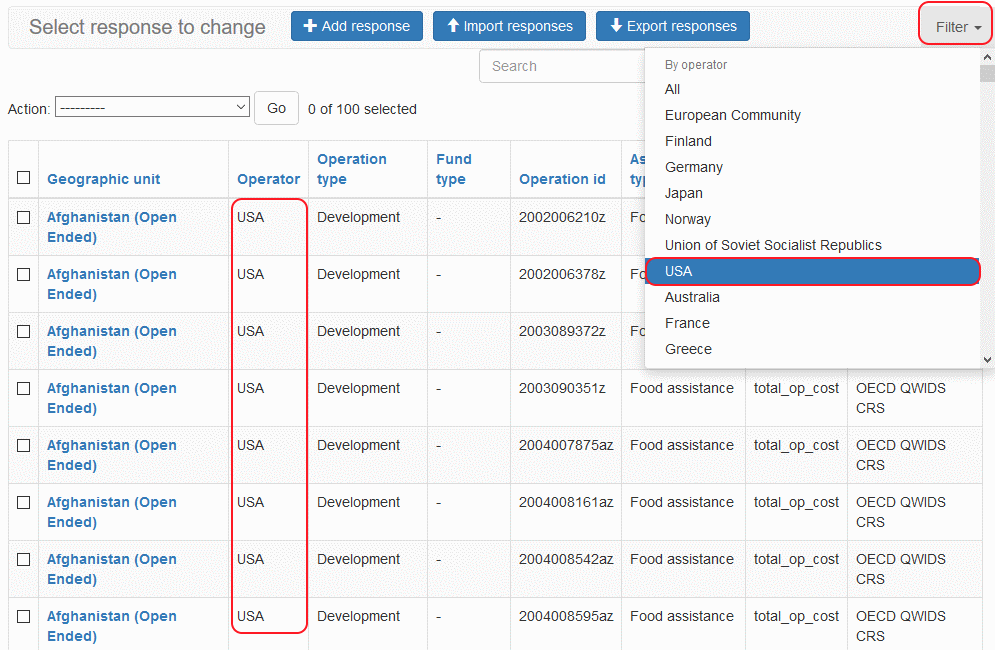
Fig. 3: Filtering Responses data
Adding Responses
This is a screen where a user can add new Response data by providing the geographic unit, operator, operation type, Indicator, and source document.
From the Responses page, click on the Add Responses button
In the Add Responses page that opens, enter all the required information. Please note that the fields shown in bold font are all required fields and the remaining fields are optional.
Click on one of the
 buttons to save the data into the system. The system will Save the data and will display a proper message about the success of the saving operation.
Save buttons
Save and add another - Saves the entered Responses information and provides an empty form to save another record.
Save and continue editing - Saves the entered data and stays on the current form for further updates
Save - Saves the entered data and opens the Responses page displaying the available data in the system
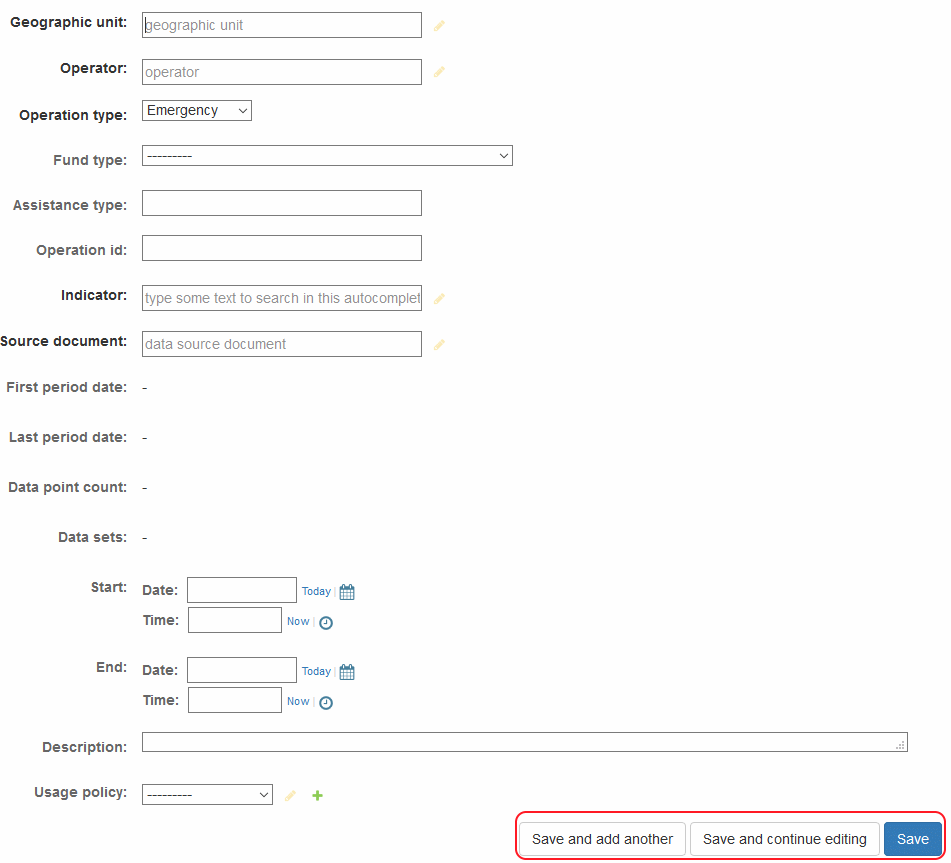
Fig. 4: Adding Responses data
Editing Responses
An existing Responses information in the system can be modified and saved as needed.
To Edit a given Response dataseries:
From the list in Responses page, click on the link within the Geographic unit column of the record you would like to edit.
The system displays the Change Responses page as shown below.
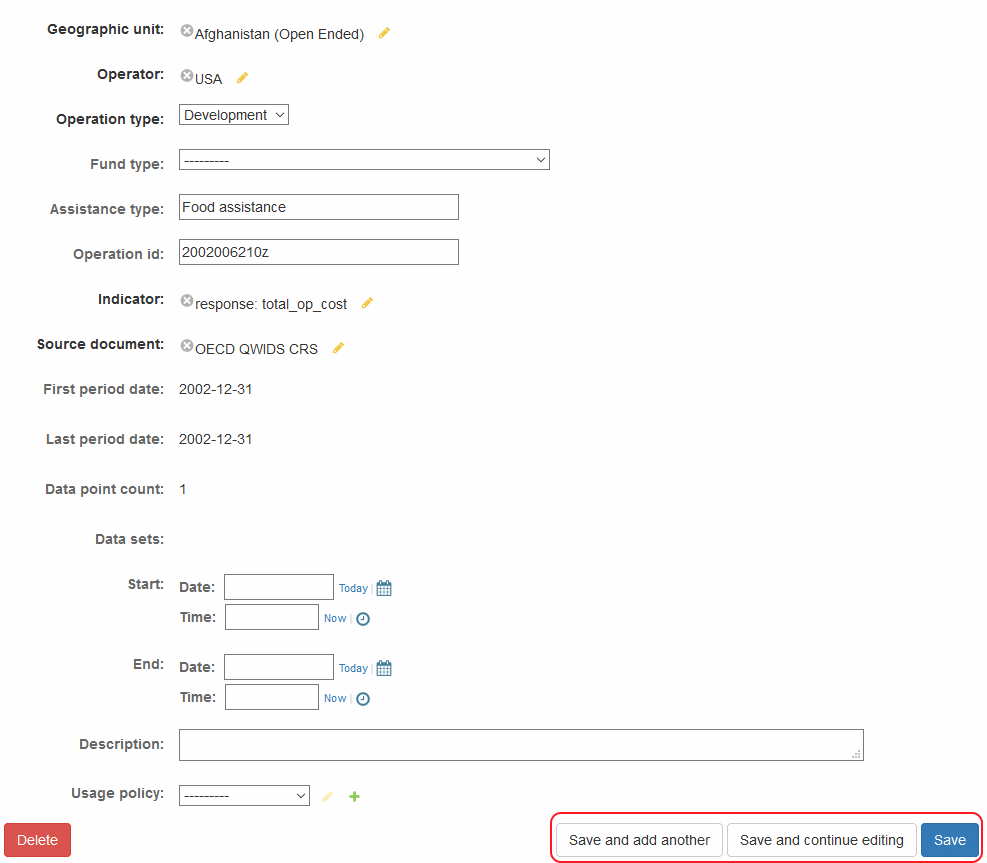
Fig. 5: Editing Responses data
Modify the data in the page as needed and click on one of the
buttons to save the modified records.The system will save the data accordingly and display success/error message.
Deleting Responses
An existing Responses information in the system can be deleted if necessary. The system allows for a deletion of one or more records at a time as given below:
Deleting a Single Responses
From the list in Responses page, click on the link within the Geographic unit column of the record you would like to delete.
The system displays the Change Responses page as shown below.
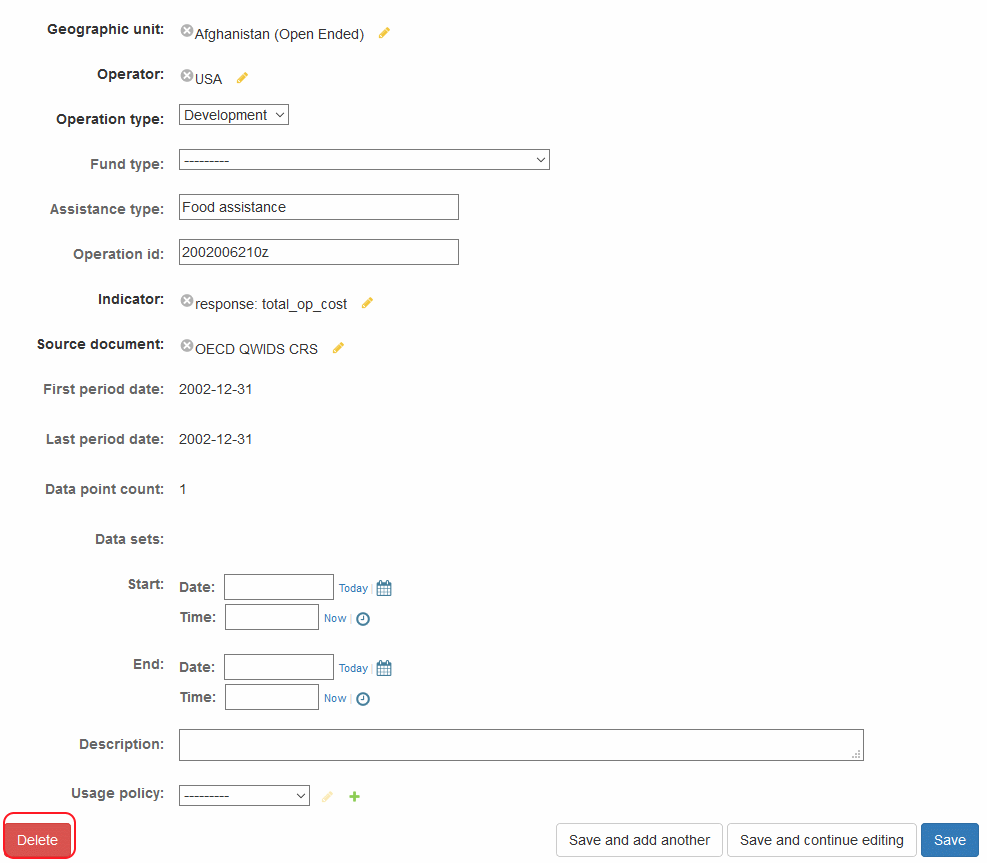
Fig. 6: Deleting Responses data
Click on the
 button at the bottom-left side of the page to delete the record.
The system will open another page with summary information on the data you are about to delete including a list of Response Values (datapoints) that belong under the Responses dataseries you selected. It will also display a prompt with a confirmation message Are you sure? and provides you with
 buttons at the bottom of the page.
If you are certain that the records can be deleted, you can click on Yes, I am sure button. If you are not certain, please click on the link No, take me back. Please note that deleted records cannot be recovered and this functionality should be used sparingly.
Deleting one or more Responses
It is possible to delete multiple Responses data from the system by following the steps below:
From the list in Responses page, select one or more Responses you would like to delete.
From the Action drop-down list at the top, select Delete selected Responses
Click on the

The system will open another page with summary information on the data you are about to delete with a list of Responses Value (datapoints) that belong under Responses you selected. It will also display a prompt with a confirmation message Are you sure? and provides you with
buttons at the bottom of the page.If you are certain that the records can be deleted, you can click on Yes, I am sure button. If you are not certain, please click on the link No, take me back. Please note that deleted records cannot be recovered and this functionality should be used sparingly.
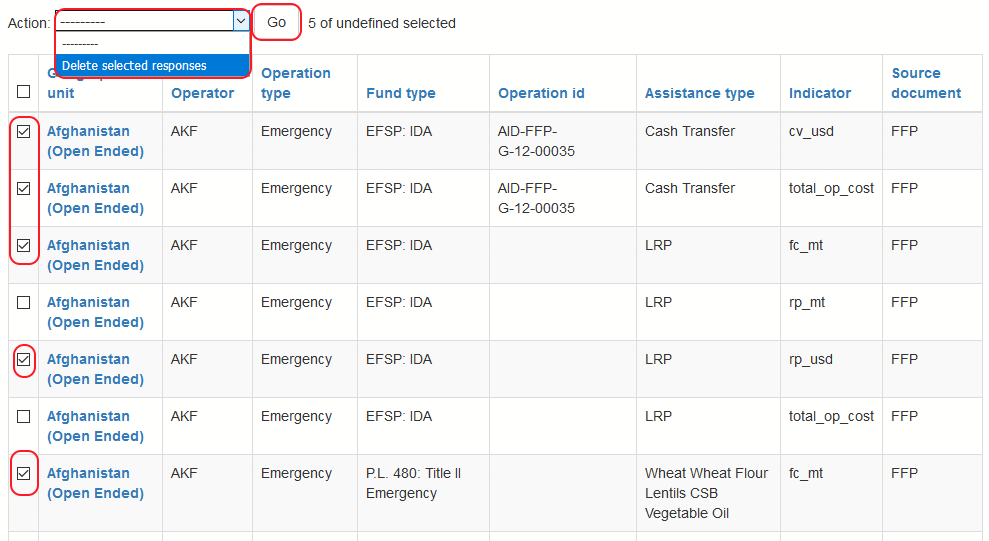
Fig. 7: Selecting Multiple Responses data for deletion
Importing Responses
Users can upload a bulk file containing columns data_source_organization, data_source_document, geographic_unit, operator, operation_type, fund_type, operation_id, assistance_type, indicator, datasourcedocument, schedule, data_usage_policy, geographic_group, fewsnet_region, start, end, id, created, modified, specialization_type, name, description, datasets, is_calculated, _country, datausagepolicy, fnid, dataseries_ptr and upload using the Import functionality in the system.
To import Responses data in a file into the system:
From the Responses pages, click on the Import Responses button.
The system opens the Import page where you can upload the file and specify the file format/type by selecting a value from the Format drop-down list.
Click on the Submit button to start the import process.
After the processing the data in the uploaded file, the system will display the summary of number of records that are:
New - the records in the file to be newly added to the system.
Updated - the records in the file that will be updated into an existing data in the system.
Delete - the records in the file that will be deleted from the system.
Skip - the records in the file that will be skipped.
Error - the records in the file that has error in the data and will not be added to the system.
Total - total number of records in the file.
To continue with the import, please click on the
 button at the right side of the page.
The Responses dataseries data will be imported and appropriate message will be displayed.
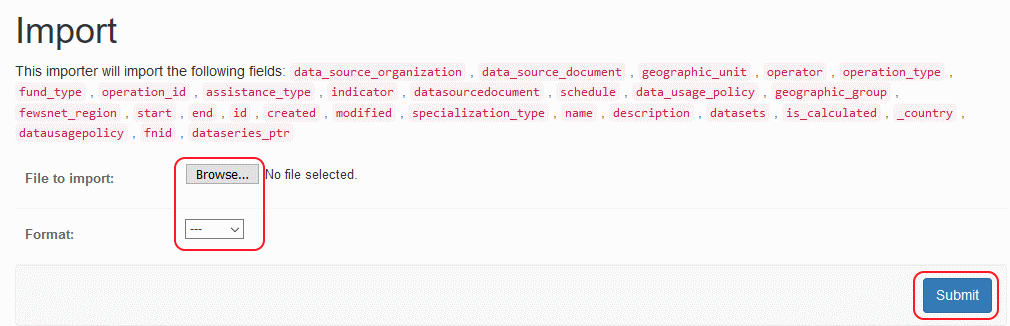
Fig. 8: Importing Responses data
Exporting Responses
A user can be able to extract/export the Responses in form of a CSV formatted file.
From the list in Responses page, click on the Export Responses page.
The system opens the Export page where you can specify the file format/type by selecting a value from the Format drop-down list.
Click on the Submit button to start the export process.
The system will display a Save file dialog box for you to select the file download location on your computer. Specify the location you would like the exported file to be saved.
The file will be saved with the selected format on your computer
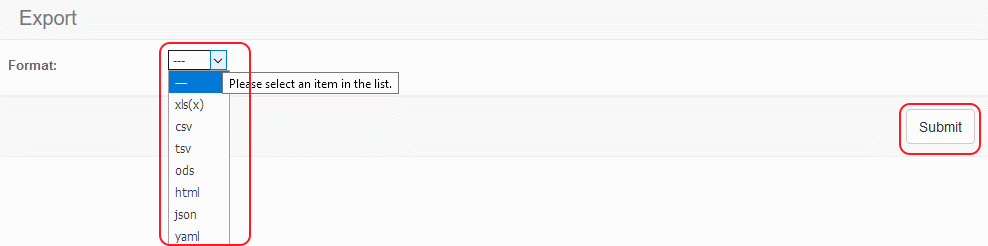
Fig. 9: Exporting Responses data
Downloading Responses
The system allows downloading of Responses data in CSV format for the selected Responses dataseries.
To download Responses data:
From the list in Responses page, click on the link within the Geographic unit column of the record you would like to download.
The system displays the Change Responses page.
Click on the
 button at the top-right side of the page.
When the system displays the save file dialog box, save the file in the desired location on your local computer.
Browsing Responses
The system also allows an on-line viewing of Responses.
To Browse Responses:
From the list in Responses page, click on the link within the Geographic unit column of the record you would like to browse.
The system displays the Change Responses page.
Click on the
 button at the top-right side of the page.
Then the system displays the Data Series Explorer page where you can see the details of the datapoints in the Responses including the Value and Previous Value of each datapoints.
Viewing Charts of Responses
The system displays the datapoints in an Responses in a flexible time-series chart format allowing you to easily see the datapoint values over a period of time.
To view Responses chart:
From the list in Responses page, click on the link within the Geographic unit column of the record you would like to chart.
The system displays the Change Responses page.
Click on the
 button at the top-right side of the page.
Then the system displays the Data Series Chart page where you can see the details of the datapoints in the Responses as a trend-line chart.
The Charts page will let you select the date range for the datapoints that you would like included in the display by:
Setting the Zoom period to 6 months, YTD, 1 year, 2 year, 3 year, 4 year, 5 year, or All datapoints in the Responses dataseries
Specifying a free start date (from date) and end date (to date)
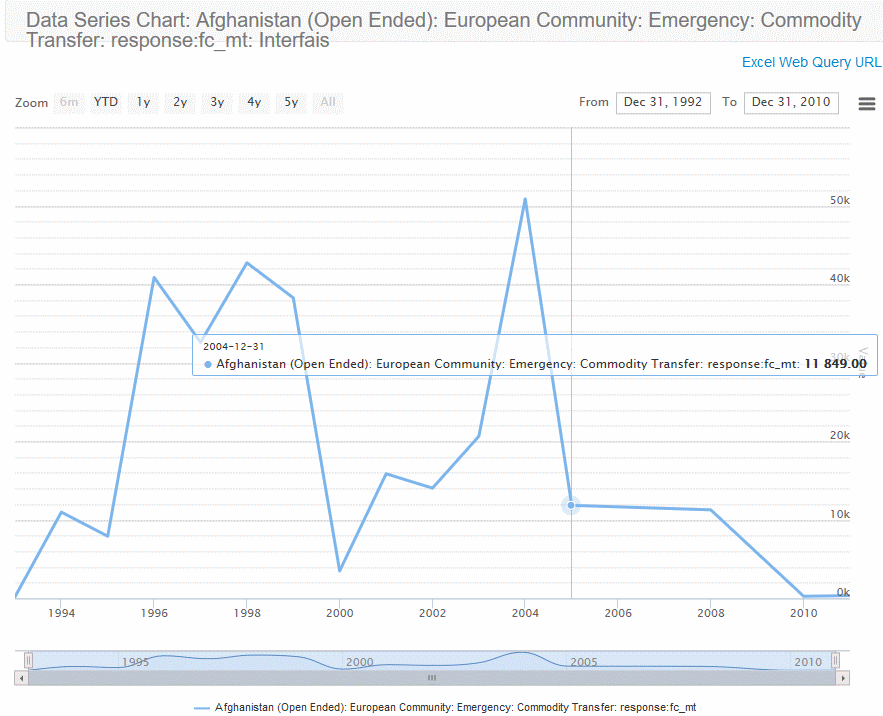
Fig. 10: Charting Responses data
Viewing History of Responses
The system tracks various events that are performed against an Responses data including the addition, updates or deletion of data in the system.
To View the history of an Responses:
From the list in Responses page, click on the link within the Geographic unit column of the record you would like to view the history.
The system displays the Change Responses page.
Click on the
 button at the top-right side of the page.
Then the system displays the Change history page where you can see the details of the updates and other operations carried out against the selected Responses record (see below).
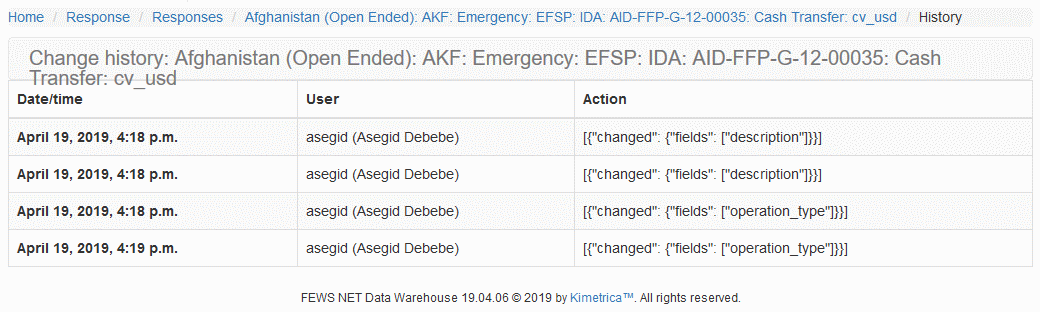
Fig. 11: Responses history.
Search or filter Response Value
The Response Value page lists the currently available Response Values in a grid format (see below) with column headers: Data series, Period Date, Collection Status, Value
The Response Value datapoint page can be opened from KDW menu: Dataseries Management > Data Points > Response Value
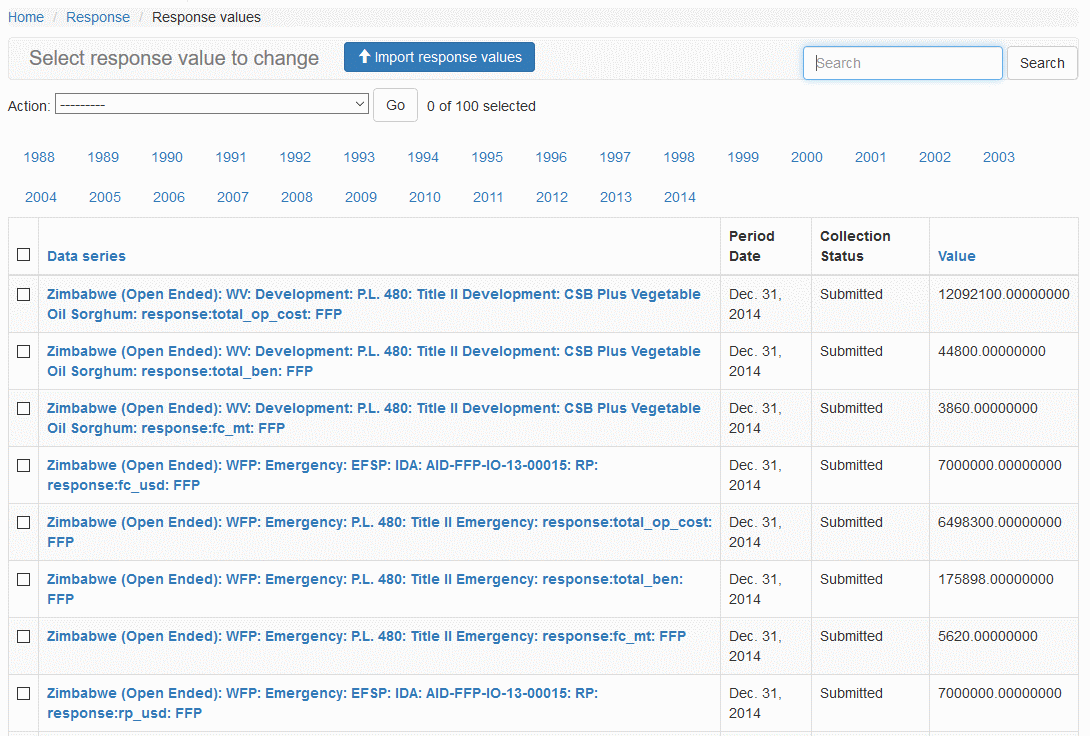
Fig. A: Response Value page
You can search the list by entering a search criteria in the Search text-box at the top of the Response Value page and clicking on the button to search and display matching results in the grid (see below).
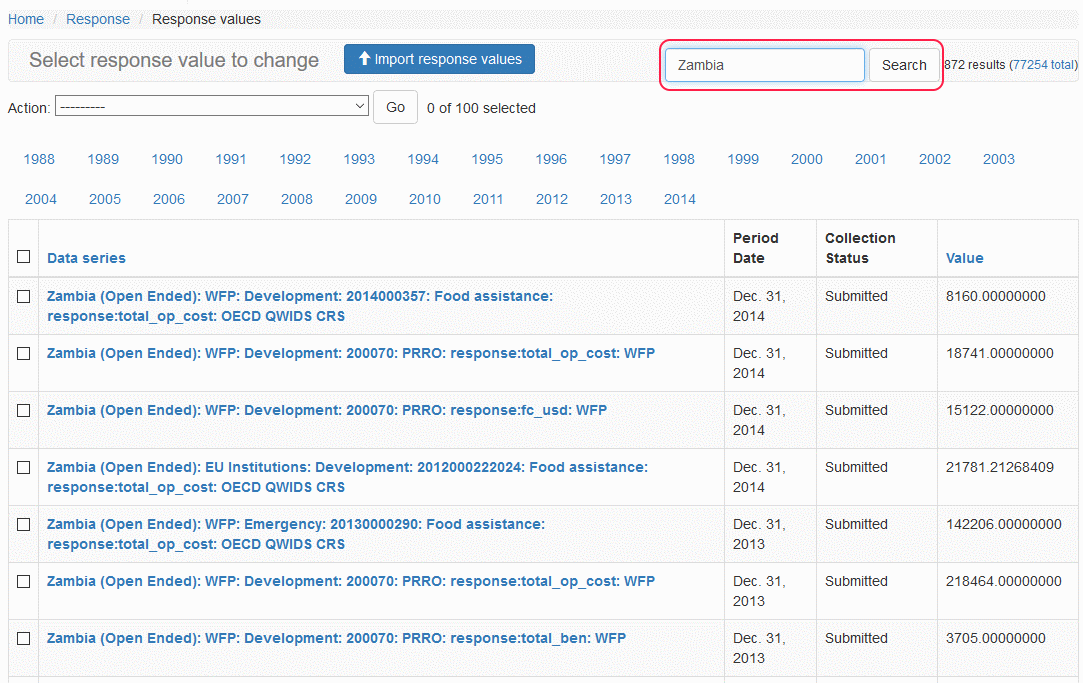
Fig. B: Search Response Value data
Adding Response Value
We can add Response Value into the system using the import functionality described below
Editing Response Value
An existing Response Value information in the system can be modified and saved as needed.
To Edit a given Response Value:
From the list in Response Value page, click on the link within the Data series column of the record you would like to edit.
The system displays the Change Response Value page as shown below.
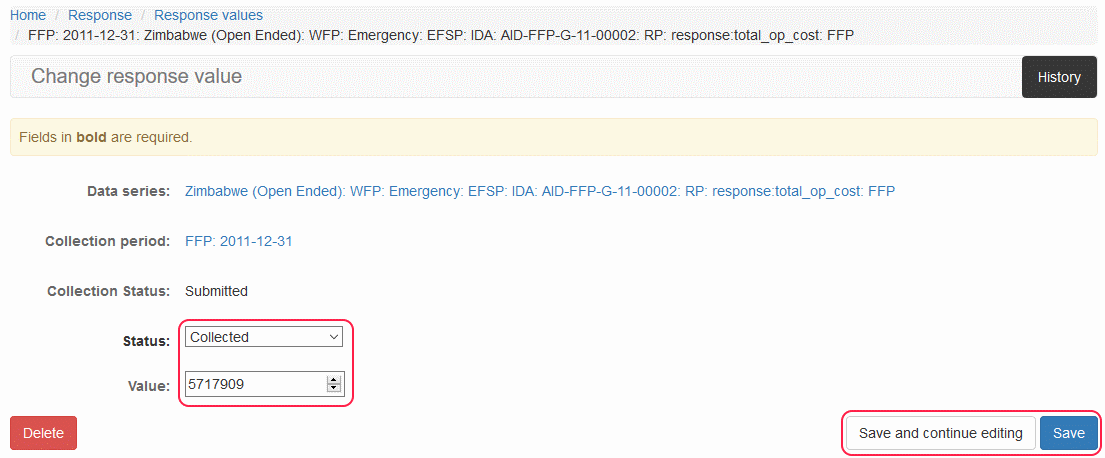
Fig. C: Editing Response Value data
Modify the data in the page as needed and click on one of the
 buttons to save the modified records.
The system will save the data accordingly and display success/error message.
Deleting Response Value
An existing Response Value record which is not yet Published in the system can be deleted if necessary. The system allows for a deletion of one or more records at a time as given below:
Deleting a Single Response Value
From the list in Response Value page, click on the link within the Data series column of the record you would like to delete.
The system displays the Change Response Value page as shown below.
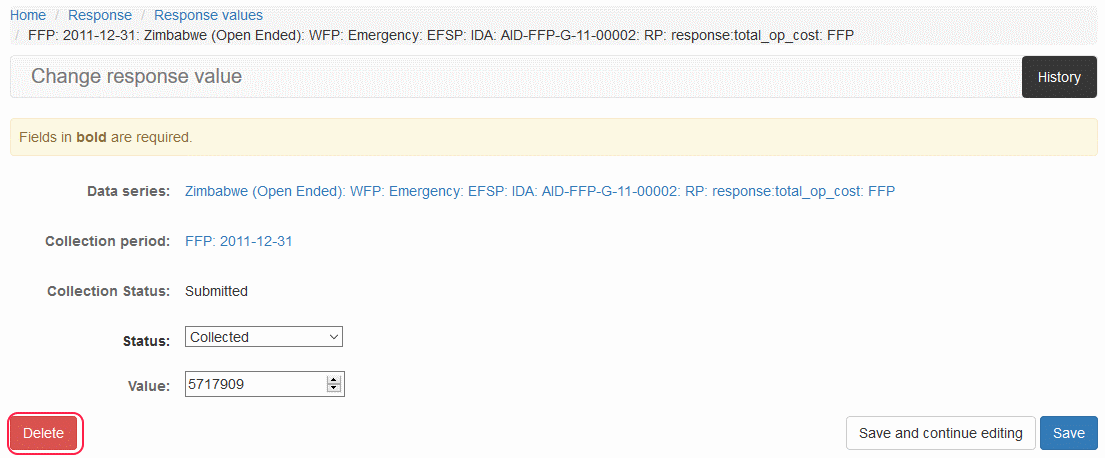
Fig. D: Deleting Response Value data
Click on the
button at the bottom-left side of the page to delete the record.The system will open another page with summary information on the data you are about to delete and a prompt with a confirmation message Are you sure? and provides you with
buttons at the bottom of the page.If you are certain that the record can be deleted, you can click on Yes, I am sure button. If you are not certain, please click on the link No, take me back. Please note that deleted records cannot be recovered and this functionality should be used sparingly.
Deleting one or more Response Values
It is possible to delete multiple Response Values records from the system by following the steps below:
From the list in Response Value page, select one or more Response Value records you would like to delete.
From the Action drop-down list at the top, select Delete selected unpublished Response Values
Click on the
The system will open another page with summary information on the data you are about to delete with a list of Response Values that you selected. It will also display a prompt with a confirmation message Are you sure? and provides you with
buttons at the bottom of the page.If you are certain that the records can be deleted, you can click on Yes, I am sure button. If you are not certain, please click on the link No, take me back. Please note that deleted records cannot be recovered and this functionality should be used sparingly.
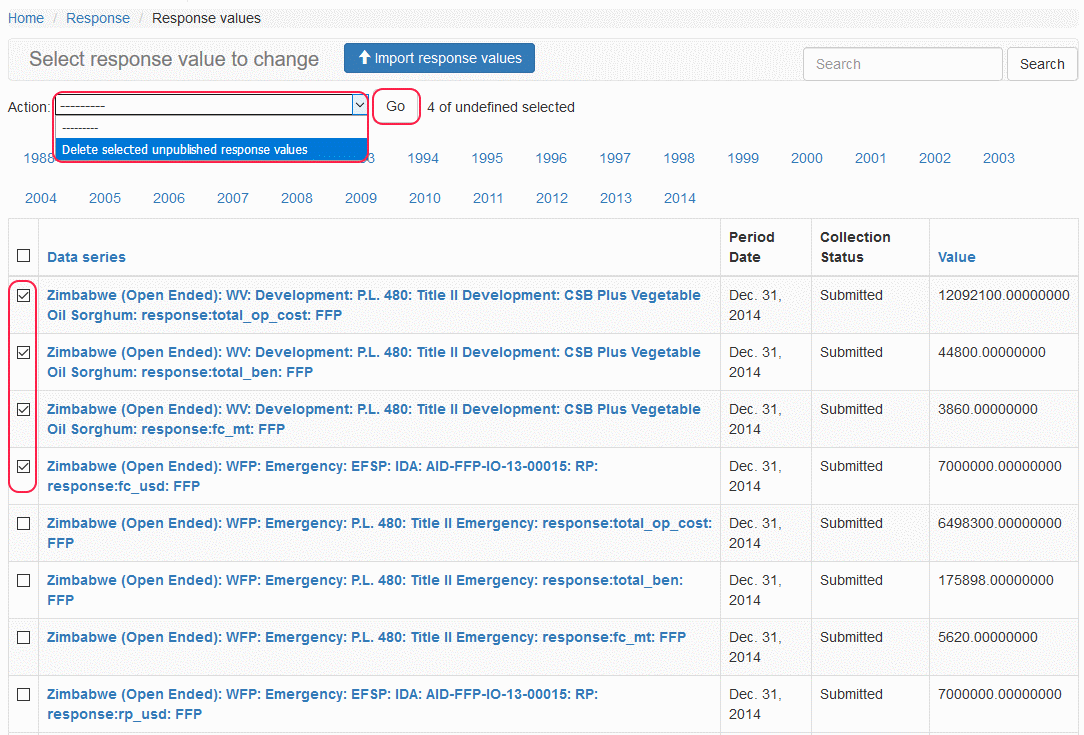
Fig. G: Selecting Multiple Response Values data for deletion
Importing Response Values
Users can upload/import a bulk file containing data_source_organization, data_source_document, geographic_unit, operator, operation_type, fund_type, operation_id, assistance_type, indicator, period_date, datapoint_status, value, dataseries, datacollectionperiod, datacollection, collection_date, collection_name, start_date, period_notes, id, created, modified, status, status_changed, specialization_type, description, high_value, ci95_low, ci95_high into the system using the Import functionality in the system.
To import Response Value data in a file into the system:
From the Response Values pages, click on the Import Response Value button or you can open the same page from Dataseries Management > Import > Import Response Values menu.
The system opens the Import page where you can upload the file and specify the file format/type by selecting a value from the Format drop-down list.
Click on the Submit button to start the import process.
After the processing the data in the uploaded file, the system will display the summary of number of records that are:
New - the records in the file to be newly added to the system.
Updated - the records in the file that will be updated into an existing data in the system.
Delete - the records in the file that will be deleted from the system.
Skip - the records in the file that will be skipped.
Error - the records in the file that has error in the data and will not be added to the system.
Total - total number of records in the file.
To continue with the import, please click on the
button at the right side of the page.The Response Value datapoint records will be imported and appropriate message will be displayed.
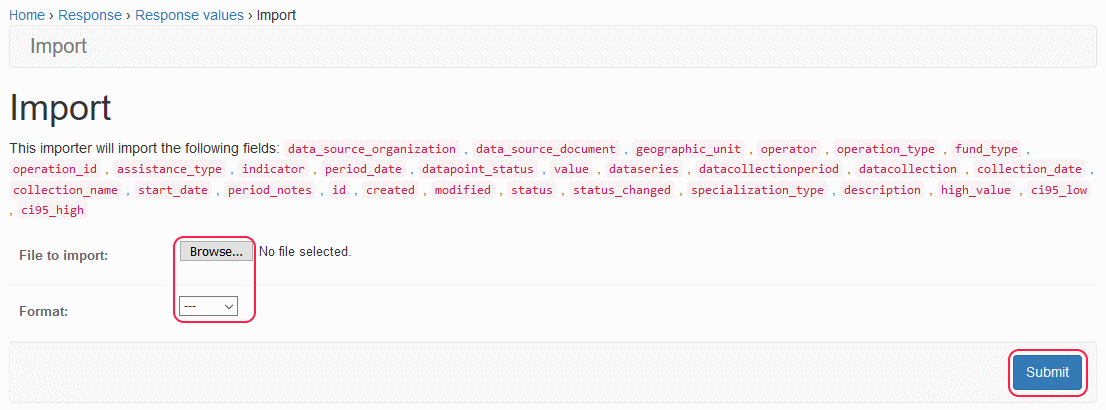
Fig. H: Importing Response Value data
Viewing History of Response Value
The system tracks various events that are performed against an Response Value data including the addition, updates or deletion of data in the system.
To View the history of an Response Value:
From the list in Response Value page, click on the link within the Data series column of the record you would like to view the history.
The system displays the Change Response Value page.
Click on the
button at the top-right side of the page.Then the system displays the Change history page where you can see the details of the updates and other operations carried out against the selected Response Value record (see below)
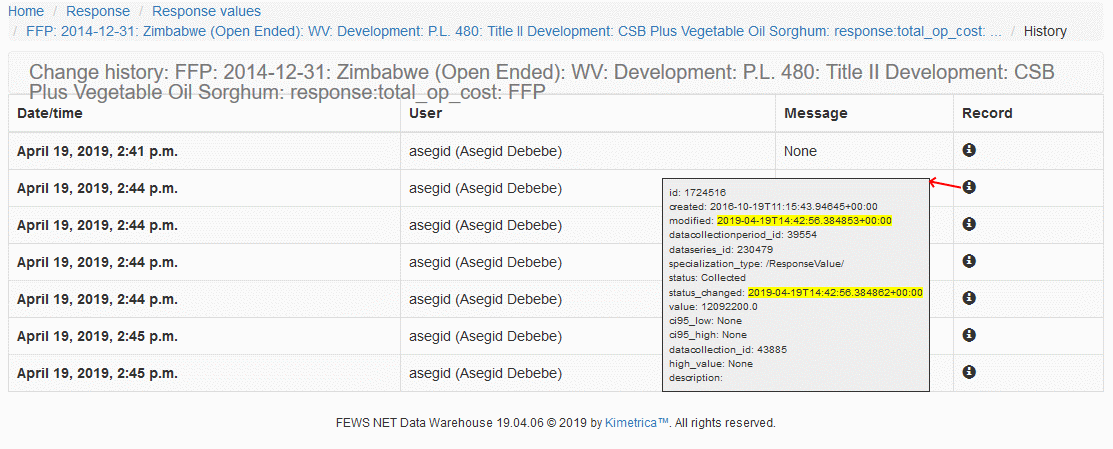
Fig. I: Response Value History